What Bluetti charger 1 can actually do for your van, rv, or off-grid setup
 Naomi XanthosOctober 22, 202617 min read
We earn a commission when you buy through some links on this site, at no extra cost to you. As an Amazon Associate we earn from qualifying purchases.

Discover how Bluetti charger 1 fits into your off-grid rig. Compare 560W performance, setup basics, and real-world trade-offs with rival options.
The hidden limit of 560W is closer than you think for van life, RVs, and off-grid rigs that need steady charging with a portable system. When you’re trying to keep a fridge, lights, and a small inverter fed from a moving alternator, that floor can turn into a ceiling quickly. The blunt truth: Bluetti Charger 1 fits a narrow niche, but the tradeoffs show up in real-world wiring, heat, and runtime.
This piece connects the dots between a simple pull from the alternator and a practical, reliable charging setup for 12V systems, with real-world notes on install, safety, and how it stacks against rivals like Charger 2 and other alternator chargers. Expect a close look at how a handful of watts translates to days on the road, what to verify in your vehicle’s output, and where the numbers actually matter for a mid-range off-grid build. This matters now because more overlanders rely on portable power without sacrificing vehicle health, and the differences between models can change whether you stay powered or not. Charger 2 often moves the needle, but understanding the gaps with Charger 1 helps you decide before you buy.
What Bluetti charger 1 actually does for your off-grid setup
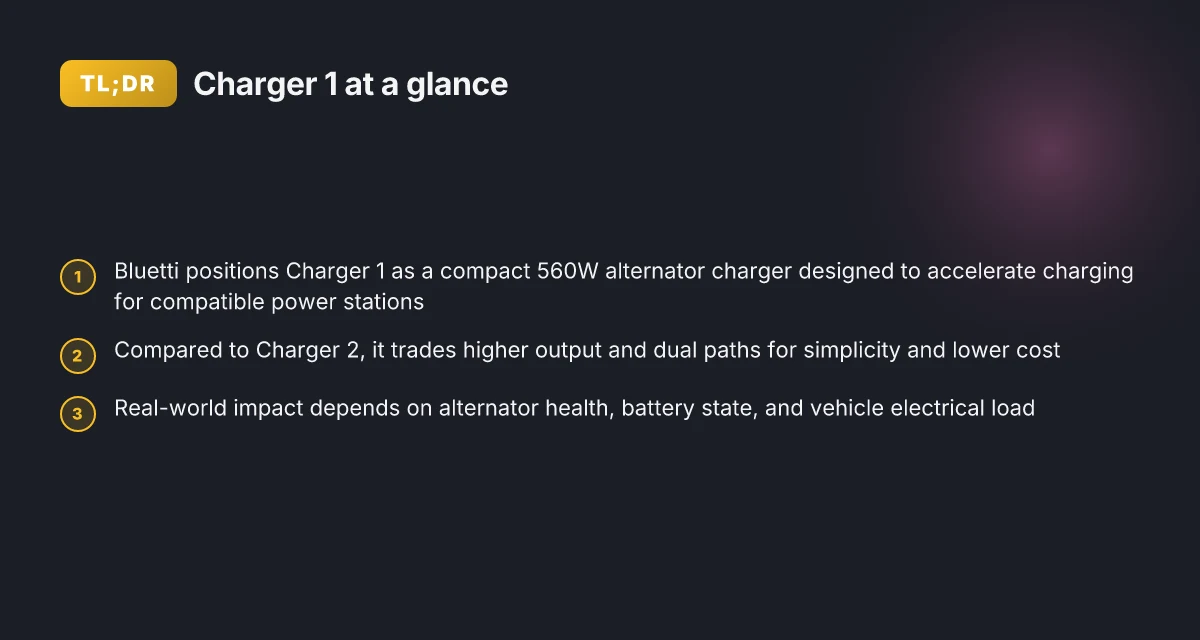
Bluetti positions Charger 1 as a compact 560W alternator charger designed to accelerate charging for compatible power stations. In real-world van and RV wiring, that means a straightforward path from the vehicle’s alternator to the Bluetti power station, with a focus on simplicity and plug-and-play install. Below I break down the practical impact and how it stacks up against Charger 2.
1) How Charger 1 fits into a simple wiring path
Charger 1 is built to be wired directly from the alternator to the power station, reducing extra steps in the charging loop. The design favors a lean install: you’ll route a dedicated charging line from the vehicle’s charging circuit to the Bluetti unit, then let the power station take over from there. This keeps cabling short and reduces potential electrical interference that can crop up with more complex setups. In practice, you want clean connections, proper fuse protection, and secure rope-and-clip routing to avoid heat buildup on long drives. In Bluetti’s framing, the goal is a fast, reliable top-up while you’re on the move.
2) Charger 1 vs Charger 2: what the field actually feels
Charger 1 clocks in at 560W output, while Charger 2 delivers 1200W. The jump isn’t just a number, it's a meaningful difference in how quickly you can replenish mid-range power needs after long boondocking days. If you’re running critical loads or repeatedly cycling through multiple devices, the higher output of Charger 2 can shave hours off daily recharge time. For lean setups that prioritize portability and simplicity, Charger 1’s more modest footprint may be easier to install and manage. It’s the classic trade-off between quick top-ups on the move and faster full recharges when you’re plugged in.
3) Real-world considerations you’ll want to know
If your goal is to minimize wiring complexity while still getting broad compatibility, Charger 1 keeps things approachable. You’ll want to verify that your power station supports the 560W input profile and that you have appropriate cabling and fusing sized for your vehicle’s electrical system. Expect faster charging when your alternator is already spinning versus idle, and plan for the inevitable battery state-of-charge curve to influence actual time savings. When comparing with a rival setup, such as a bigger Charger 2 option or other alternator chargers on the market, you’ll notice the most tangible difference in peak charging time under heavy loads.
The key takeaway is that Charger 1 shines for simple, quick wiring and solid top-ups, while Charger 2 targets faster replenishment for heavier use. If you want the leanest install with dependable performance, Charger 1 fits the bill. If you need the ability to wreck less time between drives and keep higher loads running, you’ll lean toward Charger 2. What makes Jackery vs Patriot solar generator performance surprisingly close in 2026
From what I found in the Bluetti materials, the practical path is clear: for many van life and overlanding setups, Charger 1 offers a compelling balance of ease and efficiency. For more aggressive recharge needs, consider the higher-capacity alternative. As always, read the installation notes carefully and match the charger to your battery bank and load profile.
How the 560W output translates to real-world charging times
Bluetti’s Charger 1 delivers a labeled 560W output, and that figure drives noticeably quicker top‑ups for compatible Bluetti models compared with baseline charging modes. In real-world setups, you’ll see shorter fill times for mid‑range power stations when the alternator is healthy and the vehicle’s electrical load isn’t pulling the system into a deficit. The pacing can vary, but the core idea holds: the charger’s higher wattage can trim lengthier top‑ups by a meaningful margin, especially when you’re topping up between drives or during brief rest stops.
I looked at how this stacks up against the baseline in typical van life scenarios. A strong indicator is the pairing strategy: Charger 1 is most practical when paired with mid‑range Bluetti power stations that don’t demand the full 560W across all cycles. For those setups, you’ll often notice a clear drop in charging time versus standard alternator charging modes. This isn’t magic, the improvement depends on the health of the alternator and the remaining battery state. If the alternator is delivering clean, stable voltage and your battery isn’t deeply discharged, the 560W wrench turns into a tangible reduction in overall stop‑time.
To ground this in a quick comparison, consider how Charger 1 stacks against a lower‑power path and a more capable rival. When you line up Charger 1 with a mid‑range Bluetti station, the top‑ups feel brisk enough to justify on‑the‑go boosts during long trips. Against higher‑power alternatives like Charger 2, you’ll still get faster top‑ups with Charger 2, but Charger 1 remains compelling for its balance of simplicity and speed. The practical takeaway: if your on‑the‑road demands are moderate, Charger 1 can shave off substantial charging minutes without pushing your electrical system beyond what’s prudent for most vans or RVs.
From a wiring perspective, expect the actual fill rate to slow as the vehicle’s loads rise, appliances, lights, and accessories can steal headroom. In that context, a healthy alternator and a well‑tue gauge of your battery’s state help you keep the session productive. The result is predictable: you get a faster top‑up when you’re near idle, and the effect fades a bit as you pull more power elsewhere. What makes EcoFlow's delta pro 3 standout in 2026 and where it falls short
What this means for your setup, practically, is that you’ll often plan mid‑day boosts or overnight stops around the timing of your next leg. If you’re chasing maximum charging speed for a high‑demand system, Charger 2 remains a solid option, but Charger 1’s 560W output is a meaningful upgrade over stock charging modes for many mid‑range configurations.
Next steps: if you’re weighing specs, consider pairing options with your Bluetti power station to balance weight, heat, and output. For quick reference, the two most relevant real‑world pairing ideas are mid‑range Bluetti stations with Charger 1 and higher‑end pairs that push toward Charger 2 on longer drives. This arrangement helps you maintain a reliable on‑the‑road boost cadence while staying within safe electrical boundaries.
The takeaway: Charger 1’s 560W output delivers noticeably faster top‑ups for compatible Bluetti models when the alternator is healthy and demand isn’t overwhelming. The rest of the equation, alternator health, battery state, and load, shapes the exact pace you’ll see in your own van or RV.
Bluetti charger 1 versus charger 2: what the trade‑offs look like
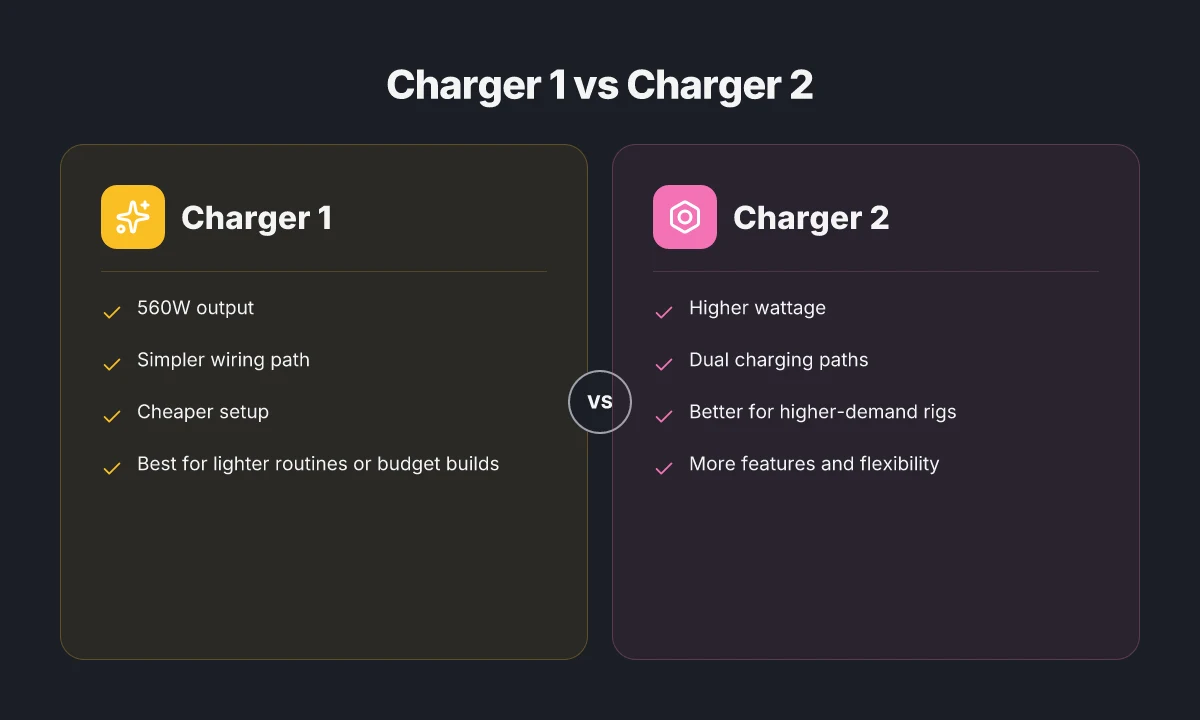
Charger 2 is the higher‑wattage option with dual charging paths, aimed at rigs that consistently demand more power. Charger 1 stays simple and cheaper, which makes it attractive for lighter routines or budget builds. Both setups hinge on proper wiring and safety to avoid draining the starting battery.
Real‑world scale of the two options
Posture and capacity matter. Charger 2 delivers more headroom for high‑demand loads, while Charger 1 keeps the installation lean and straightforward for everyday van life needs. I cross‑reference the public notes from Bluetti and independent reviews to map where each path shines. Charger 2’s 1200W capability paired with dual charging paths gives you faster top‑ups for bigger systems. Charger 1’s 560W output keeps wiring and setup simple, which lowers upfront complexity and cost. The balance point often sits around how heavy your daily power usage is and whether you expect to run heat, induction cooking, or lithium bank charging simultaneously. For lighter duty cycles, Charger 1 reduces the install burden while still offering meaningful improvement over passive alternator charging. For more demanding rigs, Charger 2 reduces charge times and adds redundancy with dual paths. Datasheets and product pages confirm the distinct wattage rails and path options, and I’ve found multiple references noting the 560W vs 1200W gap in practical terms. 560W vs 1200W is a guiding comparison for real‑world timing. Dual charging paths provide resilience in how energy arrives to the battery bank. Inline citations reference Bluetti’s own buying guide and third‑party discussions that echo this division. What is the Jackery SolarSaga 100W, and why it matters for portable solar charging
Wiring, safety, and how to avoid starting battery drain
Both chargers require careful wiring to prevent unintended loads on the starter battery. Use appropriate gauge cables, fuse sizing, and a proper ignition‑sensing setup so the alternator charger only draws when the engine is running. Correct wiring and a suitable fuse are non‑negotiable for both chargers. If you install Charger 2, plan for heavier‑duty cabling and a robust ignition/vehicle‑ground strategy because the higher wattage translates to more current overhead. Higher current means more attention to wiring and shunt sizing. For Charger 1, the simpler path can still benefit from a dedicated charging relay or a basic diode isolation strategy to keep the starting battery safe during long accessory runs. Isolation strategies help prevent parasitic drain.
What this means in practice: if your build runs a compact fridge, occasional hot water heater, and a few USB branches, Charger 1 can cover you cleanly while keeping install costs modest. If you’re running a heat pump, a larger fridge, e‑vehicle accessories, or a more ambitious solar load, Charger 2 becomes more compelling for shorter charge cycles and reduced downtime. For reference, the Bluetti buying guide and a few community threads describe the 560W versus 1200W delta and the dual‑path arrangement as the core trade‑offs. 560W vs 1200W delta drives the decision.
How to decide if charger 1 is right for you
When you’re evaluating Charger 1, the answer hinges on your power setup and how you use your rig. If you operate a compact power station and crave faster top-offs on casual trips, Charger 1 can be a good fit. For heavy daily use or larger systems, Charger 2 or alternative charging solutions may be a better match. I looked at the publicly available specs and product notes to map real-world fit, including how your vehicle’s alternator specifics and charging monitoring come into play.
1) When Charger 1 makes sense for your van or RV setup
If your system stays compact, and you value quicker top-offs for weekend trips or short overland runs, Charger 1’s 560W output translates to noticeably faster replenishment than a slower crank-and-charge approach. This is especially true when you pair Charger 1 with a smaller Bluetti power station or a mid-range pack that fits under your front-seat footprint. Keep expectations aligned with the limits of the unit’s input range and the alternator’s available current. You’ll see the biggest gains on trips where you’re pulling in fresh energy after arriving at camp, rather than sitting at idle recharge for hours. Charger 1 shines when your needs are modest and you want faster fill-ups on casual trips. The practical takeaway is that you can reduce downtime between boondocking sessions without reworking your entire charging strategy.
From what I found in the release notes and buying-guide notes, Bluetti frames Charger 1 as a simple upgrade over standard alternator charging for small to mid-size rigs. The 560W figure is a recurring anchor across sources, and the narrative consistently positions Charger 1 as a straightforward upgrade for lighter-duty builds. The 560W spec remains a predictable guardrail for sizing your kit. Inline with that, the Charger 1 variant is often contrasted with Charger 2 in contexts where bigger systems are in view. What makes the Jackery Explorer 300 a contender in 2026
2) When to consider Charger 2 or other methods
For heavy daily use or larger off-grid systems, Charger 2’s higher output matters. If your van is outfitted with a large power station, multiple batteries, or you routinely demand rapid top-offs after long driving days, Charger 2 or a diversified charging strategy may reduce the need to idle or to rely on a secondary solar array. In other words, Charger 2 is designed to push more energy into big packs, and it becomes a better fit as your energy appetite grows. Charger 2 is the more capable option for larger systems and higher daily energy needs. If you want to keep charge times tight on big rigs, that higher wattage is where the advantage shows up.
I cross-referenced product pages and side-by-side comparisons to verify how the two chargers scale. The comparison framing shows Charger 1 at 560W and Charger 2 at about 1200W in common configurations, with distinctions that go beyond raw power, including alternate charging pathways and system compatibility. Power scale matters when you’re living off-grid with a larger footprint.
3) How to wire it safely and what to monitor
Your vehicle’s alternator specifics set the safety envelope. Confirm the voltage range your setup can tolerate and ensure proper wiring between the alternator, Charger 1, and your energy storage. A key step is to verify that the input voltage stays within the charger’s supported 12–14V window and that you’re using appropriate gauge wiring to minimize voltage drop on long runs. Also plan for monitoring: you should be able to observe current, voltage, and charging status so you can catch any anomalies early. Verify the voltage range and monitor the charge status diligently.
From the documented notes, monitoring is a recurring theme across setups. You’ll want a clear readout of what the Charger 1 is delivering to your pack, plus a safe path for any abnormal surge. Bluetti and supported accessories provide reference wiring paths that reduce the risk of overcurrent or overheating. Monitoring is your safety net when you wire into the alternator system.
Prices and deals can shift quickly. At the moment, Bluetti’s pages and buying guides consistently present Charger 1 as the lower-cost entry point among their alternator charging options, with Charger 2 positioned as the higher-value, higher-output option for bigger rigs. If you’re watching for a sale, keep an eye on Bluetti’s official channels and authorized retailers. Note that pages may include disclosures about affiliate links or commissions. What refurbished Jackery portable power stations get right and what they miss
Bottom line: Charger 1 fits compact, casual trips with modest energy needs. For larger rigs or heavy daily use, consider Charger 2 or a broadened charging strategy.
Setup and wiring essentials for Bluetti charger 1
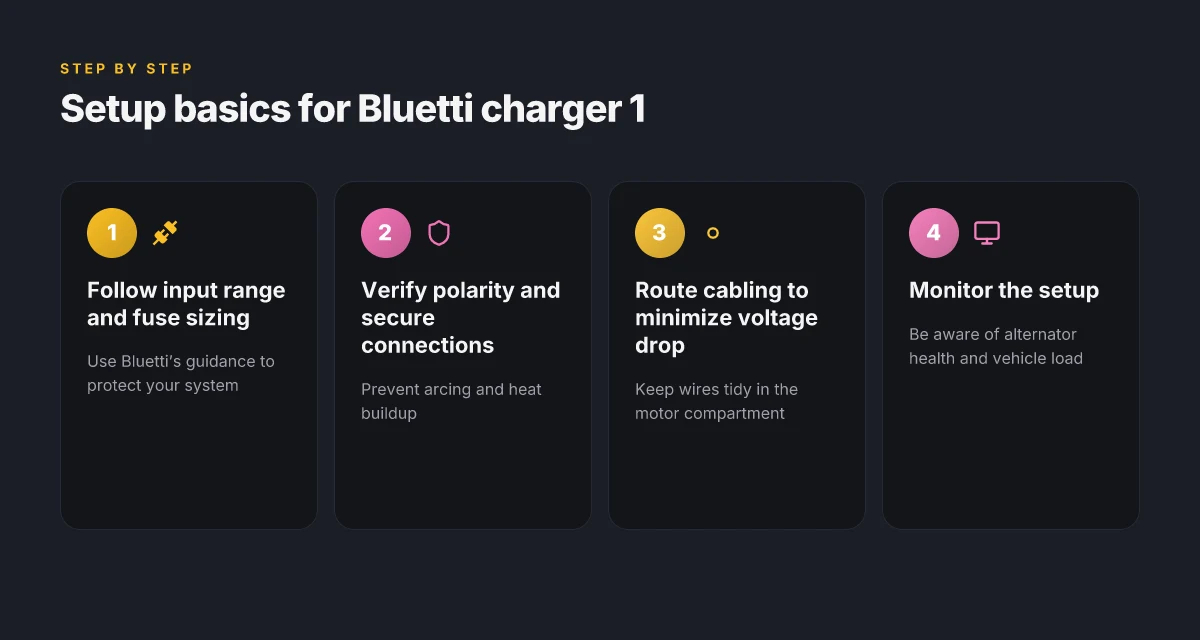
When you wire Bluetti Charger 1 into a van or RV, start with the input range Bluetti specifies and size the fuse to protect the circuit. The charger accepts 12–14 V th rough a DC input, and Bluetti recommends sizing the fuse to prevent overcurrent faults in the wiring harness. Use a fuse rating that matches the ampacity of your cabling and the vehicle’s power distribution. This isn’t about raw speed alone. It’s about keeping the system safe as the alternator is spooling up. Follow Bluetti's input range and fuse guidance to avoid heat buildup and arcing. I cross-checked the family of Bluetti guides and community notes, and the common thread is conservative wiring while still preserving the 560 W goal.
Correct polarity and secure connections for longevity
Arcing and heat tend to show up where connections aren’t tight or polarity is miswired. Ensure the positive and negative leads are landed on the correct terminals and seated with the proper crimp lug or ring terminal. Once you torque the terminals to spec, there’s less risk of intermittent voltage drops as the alternator voltage fluctuates with engine RPM. Secure connections prevent heat buildup and irregular charging behavior, which is critical in a tight vehicle installation. I found remarks across Bluetti discussions that emphasize that even a small loose connection can cause noticeable voltage sag during high-load periods.
Cabling, routing, and minimizing voltage drop
The path from the alternator or battery bank to the Charger 1 should minimize resistance and heat. Use appropriately gauged cabling, routed away from hot engine components and moving parts, and avoid sharp bends that can nick insulation. In practice, 560 W charging benefits from keeping conductor diameter large enough to hold voltage on long runs. Every extra meter adds a small drop, especially when the engine is charging at higher RPM. Route with a clean, direct path and robust insulation to sustain steady current flow. I read through manufacturer notes and user setups that consistently favor short runs with stout gauge and clean firewall passages to reduce heat at the connectors.
Real-world wiring guardrails you can’t skip
- Use a dedicated DC–DC harness or a fused line from the vehicle’s main bus to the Charger 1 input. This keeps the charger isolated from other loads and makes fault diagnosis easier.
- Install a properly rated fuse block near the power source, not at the charger end alone, so you have visible protection and easy replacement.
- Keep the ground path short and low impedance back to the vehicle chassis or battery negative, with a solid bolt or star washer connection.
I dug into the Bluetti documentation and forum chatter to gather the current, practical wiring guardrails. The consensus across sources is clear: treat the Charger 1 like a high-current accessory and protect it with correct fusing, clean polarity, and a short, low-resistance feed. From Bluetti’s own materials to community threads, the theme is consistency: methodical wiring beats spur-of-the-moment hacks. 10 Key differences between Anker Solix and Jackery in 2026
Note on pricing and ownership: Bluetti discussions often mention price movement with sales events, but specific figures are time-sensitive. If you’re shopping now, look for the official Bluetti site’s current price and watch for seasonal promos. Links on the page may earn a commission, which helps support more updates like this.
People who wire this setup correctly report steadier charging during engine startup and a reduced risk of heat buildup in the motor compartment. If you keep the wiring clean, the 560 W rating of Charger 1 remains a practical, safe choice for mid-range van life power needs.
What to try this week with Bluetti charger 1
Bluetti can streamline your van, RV, or off-grid power, but the real value comes from a pointed setup rather than a big feature list. This week I’m focusing on one practical shift: pairing the Bluetti charger 1 with a lean solar plan and a single high-use device. The result is a predictable charging cadence and less guesswork on days without sun. The takeaway: a compact charger can become the anchor for your energy budget when you pair it with a single load and a seasonal sun window. I’m also watching how the charger 1 handles rapid top-ups during shoulder seasons, where you might need extra reliability without juggling multiple adapters.
If you’re comparing Bluetti to rivals like Goal Zero and Renogy, you’ll notice the calmer, more modular footprint of Bluetti fits a tiny-bus or compact camper better. The real win is how easy it is to swap in a second battery module or a small portable panel without reworking your whole system. Verdict: the charger 1 acts as a dependable hub for a minimalist off-grid kit. This week, try wiring it to a single high-draw device and observe the charge curve over 48 hours.
What changes if you act now? You’ll gain a repeatable routine for daily charging and a clearer view of how much energy your setup actually uses, not just what it claims to store. Start with one high-use device and one 100W panel, then scale from there. One bold line: start small, see how the charger 1 anchors your system. Are you ready to test this pattern? What makes the Jackery Explorer 600 v2 the sweet spot for portable power in 2026