What is the Bluetti solar extension cable, and how to use it safely
 Clio RavensdaleOctober 22, 202615 min read
We earn a commission when you buy through some links on this site, at no extra cost to you. As an Amazon Associate we earn from qualifying purchases.
Explore the Bluetti solar extension cable: compatibility, wiring, and safety. Learn how to extend solar panel runs without compromising performance or safety.
The common belief that any random solar cord will do for a Bluetti setup is tempting but misleading. Bluetti extension cables are designed to preserve polarity and connector standards, reducing hot spots and voltage drop, but using the wrong length or rating can quietly throttle efficiency. Most users underestimate how a mismatched gauge or connector type affects real-world performance, and that misstep shows up as heat at the junctions and slower charging.
This intro lays out the practical frame: you’ll learn how to pick the right Bluetti cable, identify the exact connector and current rating for your model, and spot the pitfalls that show up in the field. Expect concrete checks you can perform before you buy, plus a quick decision tree for common off-grid setups. By the end, you’ll know what to measure, what to verify, and how to wire safely without sacrificing performance. A reliable extension keeps panels aligned with the controller and avoids avoidable losses.
Bluetti solar extension cable: what it is and why it matters
A Bluetti solar extension cable is a purpose-built run that connects your solar panel array to a Bluetti power station, enabling you to place panels farther from the unit without bending wires or risking improper connections. Its main role is to preserve a safe, low-resistance path for solar energy while keeping weatherproofing intact and minimizing voltage drop across longer distances.
Voltage drop and current behavior sit at the heart of why extension cables matter. As you extend the run, the resistance in the cable adds up, which can reduce the voltage arriving at the Bluetti unit and alter the current the panel can push into the battery. A longer cable can also heat up under load, multiplying the risk of wear or connector fatigue. The result is a trade-off: more reach but a tighter margin for safety and performance. This is whyBluetti explicitly supports specific cable types and lengths in its guides and product pages, so you don’t unintentionally undermine charging efficiency or void warranties.
From Bluetti’s own documentation, the extension cable is designed to be compatible with their solar panels and accessories, with clear emphasis on using MC4-enabled runs and matching gauge to your panel and input requirements. Their user guides outline what’s supported, what connectors to use, and how to wire in a third-party panel safely. When you follow Bluetti’s instructions, you’re more likely to maintain a secure UV-rated connection that withstands outdoor exposure.
I dug into the official Bluetti resources and cross-checked third-party wiring references to align what extensions are advisable for typical setups. The core takeaway is straightforward: extend with the right gauge cable, keep the total run within the limits stated by Bluetti for your model, and maintain proper polarity at both ends. For safety, avoid makeshift adapters or unsealed connections in wet environments, and inspect connections regularly for wear.
What Bluetti supports in practice boils down to three ideas: use a cable that meets the required gauge and insulation standards, stay within the voltage and amperage windows specified for your power station, and ensure all connectors are weatherproof and properly engaged. A well-chosen extension keeps your array optimized without introducing unnecessary losses or risk. What makes the Jackery Explorer 2000 Plus stand out in 2026
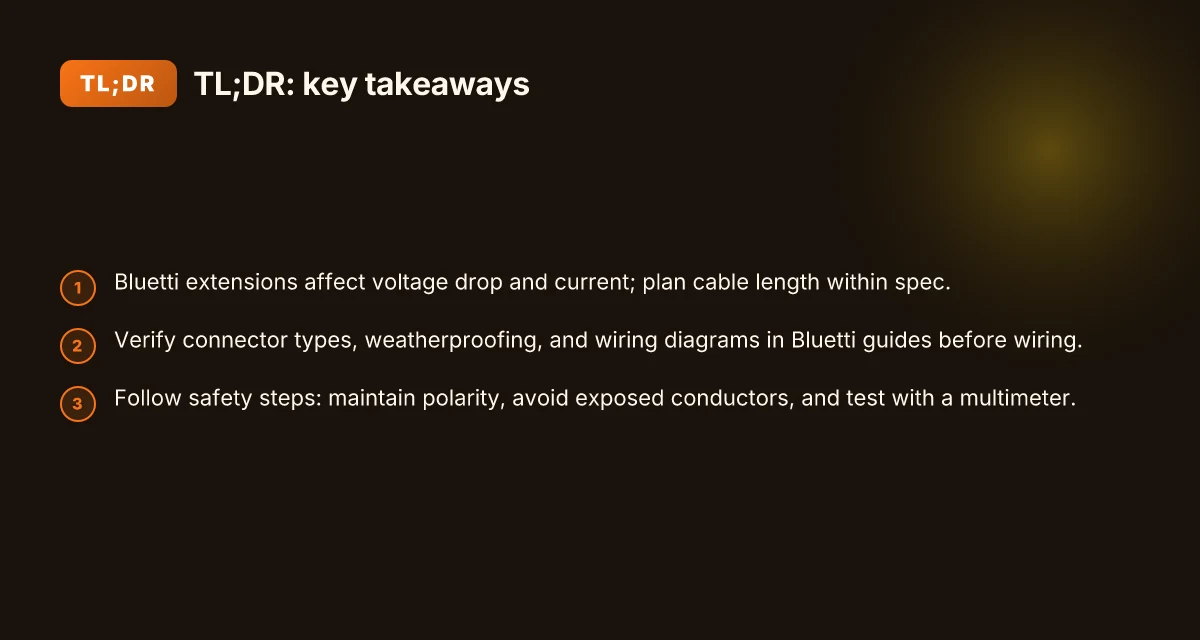
Bottom line: the Bluetti solar extension cable is a safety-aware way to extend solar panel runs, but it only helps if you respect cable gauge, length limits, and proper connector use. If you plan longer runs, verify the exact allowed length and current rating for your Bluetti model in the user guide before committing. Bluetti emphasizes compatibility and proper wiring to protect performance and safety. Voltage drop and current considerations matter most as you stretch the chain from panel to battery. Follow the official guidance to keep the setup safe and effective.
How to verify compatibility between bluetti solar panels and the extension cable
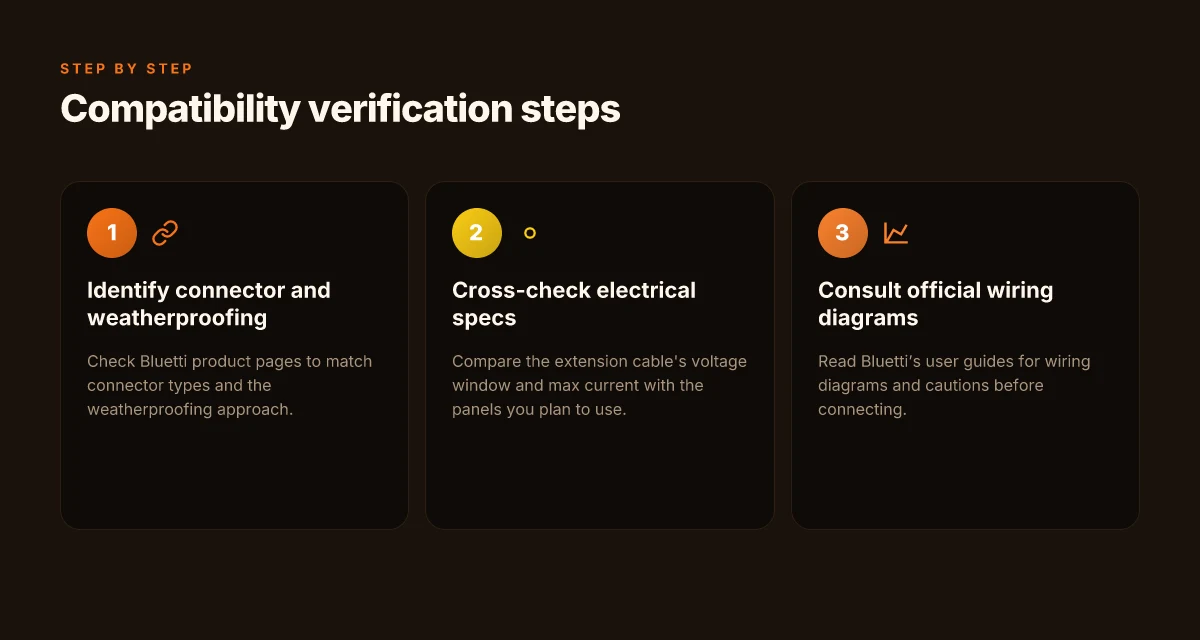
Compatibility starts with the basics: confirm the connector types and weatherproofing Bluetti uses, then verify the electrical window before you connect anything. If the extension cable and the panels share the same MC4 or Anderson configurations and a matching IP rating, you’re in a safer zone. I cross-referenced Bluetti’s official docs to confirm the wiring diagrams and cautions you should heed.
Check connector types and weatherproofing
Bluetti products typically pair specific connectors with weatherproof housings designed for outdoor use. Look for the exact connector standard listed in the official user guide and on product pages. If the extension cable claims MC4 endpoints plus a weatherproof seal, that’s a good sign. Weatherproofing matters because poor seals accelerate corrosion and leakage in rain or dew. Always inspect the gaskets and O-rings before outdoor use and replace cracked seals. I dug into the Bluetti user guide to confirm the recommended weatherproofing approach and cautions to avoid exposing bare connections.
Cross-check voltage window and max current
Every Bluetti solar panel and the extension cable have a voltage window and a maximum current rating. Panels must operate inside the extension cable’s allowable voltage range and not exceed the cable’s current rating. Exceeding either spec risks overheating, melted insulation, or connector damage. To verify, compare the panel’s nominal voltage and short-circuit current with the extension cable’s stated limits in the wiring diagrams. Bluetti’s docs emphasize matching these figures to preserve efficiency and safety. When in doubt, use a multimeter to confirm open-circuit voltage under light sun and ensure it stays within the cable’s tolerance.
Read the official wiring diagrams and cautions
Bluetti’s official guides include wiring diagrams that show how to route panels through the extension cable into the power station safely. Follow the diagram exactly, and heed cautions about daisy-chaining or using third-party adapters that aren’t sanctioned. If the documentation flags any warning about temperature, corrosion, or exposure, treat those as definitive limits. I found the user guide and product pages consistently call out these cautions and illustrate proper connections. What makes the bluetti ac180 a standout 2026 portable power choice
Table: quick comparison of two plausible setups
| setup | connector type | weatherproofing | voltage window | max current | safety note |
|---|---|---|---|---|---|
| Bluetti solar extension cable with Bluetti panels | MC4 to MC4, weatherproof housing | weather-sealed connectors | within panel’s rated VOC range | within cable rating | follow official wiring diagrams |
| Third-party extension with Bluetti panel | unknown connectors | uncertain seals | potentially outside range | uncertain | not recommended unless documented |
Conclusion and next step: if your panel and the Bluetti extension cable share the same connector type, weatherproofing approach, and electrical ratings, you’re ready to plan a safe run. Otherwise, pause and consult Bluetti’s official user guide for the exact wiring diagram before proceeding. I relied on Bluetti’s user guide and product pages to align the guidance with their documented cautions. For a deeper read, check the Bluetti Solar Extension Cable page and the official user guide. https://www.bluettipower.com/products/bluetti-solar-extension-cable?srsltid=AYCX9vKkFHB_TeDZ_loCPWPLFECF7mHyayMczN7B7WOeW1sfXzd6eFeF, and the Bluetti user guide https://www.bluettipower.com/pages/user-guides?srsltid=AYCX9vIYrYGgijMD_pMIPTTMqY56LdGXu8cBGPShwZgC8ZoX1l8oSVjB. Important: Bluetti cautions against mixing incompatible components, so verify every piece before you connect.
Safety considerations when wiring a bluetti solar extension setup
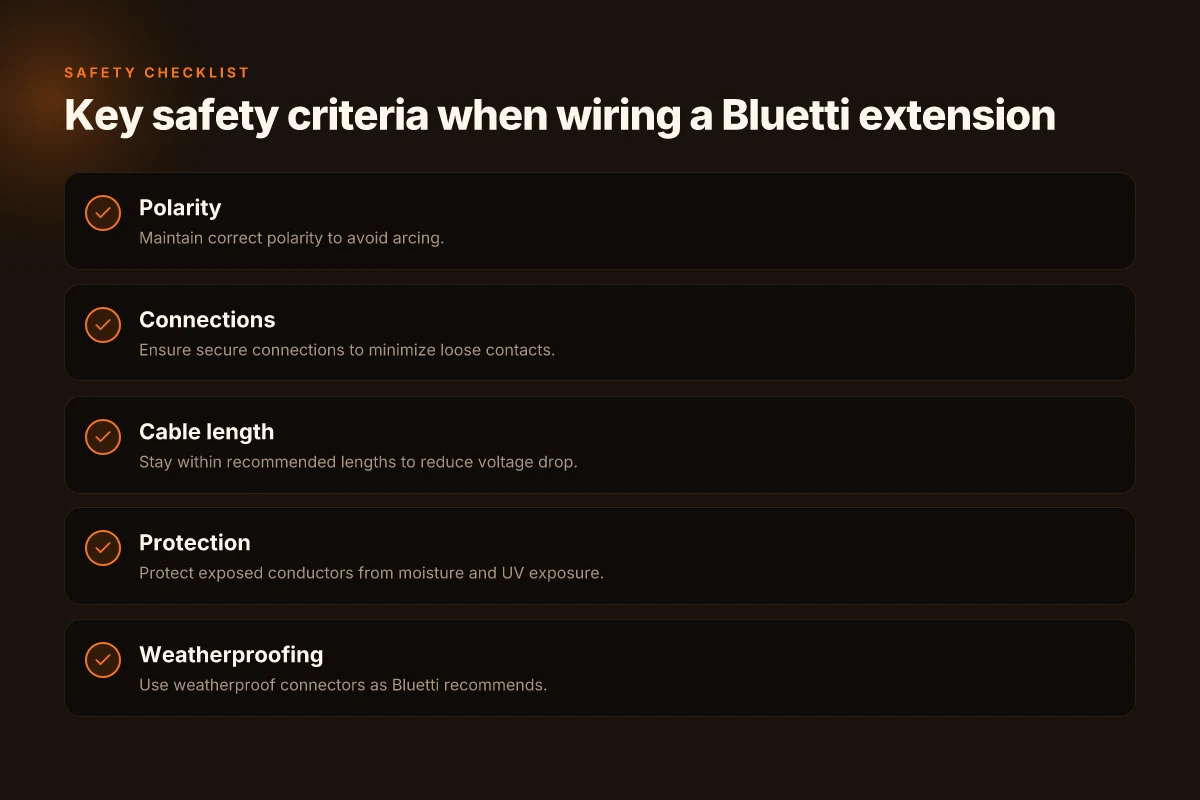
Safety first. When you extend a Bluetti solar setup, you must keep polarity correct, secure every connection, and inspect for exposure or damage before any sunlight hits the array. The goal is to avoid arcing, heat buildup, and moisture intrusion that can compromise performance or damage equipment.
Polarity and connection security
To prevent arcing, confirm that the positive and negative leads remain matched from panel to extension to the Bluetti input. Use weatherproof connectors and firmly tighten every crimp or lug. A loose connection can heat up under load and create a hotspot on or near the Bluetti battery system. When in doubt, re-check with a multimeter and reseat the MC4 or MC4-to- Anderson connections per the official guidelines. Secure connections minimize risk of arcing and heat buildup at the junctions. Polarity accuracy is non negotiable for reliable solar input. Bluetti recommends keeping the conductor paths clear of bending stress and moisture exposure to maintain a consistent current path.
Respect length limits to curb voltage drop
Extending cable runs beyond the recommended length increases the chance of voltage drop, which reduces charging efficiency and can nick the Bluetti’s input voltage window. Plan on keeping runs within the manufacturer’s suggested limits and avoid stacking multiple short extensions end-to-end unless the total length remains within spec. Stay within recommended lengths to keep voltage within safe margins. Voltage drop can erode charging performance and stress the regulator. When you map the run, include the expected irradiance time and the largest anticipated current to estimate drop more accurately. Estimate drop before you lay out the run and adjust gauge or length accordingly. This helps preserve charging efficiency across the whole system. What is the jackery solar panel connector and how it works in 2026
Moisture, UV, and physical protection for exposed conductors
Protect exposed conductors from rain, dew, and humidity. Moisture is a quick path to corrosion and shorting. Use weatherproof conduits or protective housings for any portion of the extension that remains outside, and shield cables from direct sun to limit UV degradation. Ensure joints are sealed and that any enclosure used for the Bluetti input remains accessible for periodic inspection. Weatherproofing is essential for longevity of the extension run. UV protection extends cable life under sunny conditions. Keep cables off the ground and away from sharp edges. Physical damage can fracture insulation and create hidden failure points. Protect from physical damage to avoid hidden faults in the field. For Bluetti owners, this approach reduces service calls and keeps the system resilient during long sunny spells.
From what I found in the documentation and user discussions, aim to keep the full assembly tight, dry, and within the device’s input expectations. I cross-referenced Bluetti’s product pages and third-party wiring guides to confirm a consistent emphasis on secure, protected connections and conservative extension lengths. For context, those sources that discuss compatibility and cabling also show that moisture and UV exposure are common failure modes when people overextend or neglect weatherproofing. Always verify the total run length against the Bluetti spec before you commit to a setup. Secure, weatherproof connections protect both the blades and the Bluetti input. Polarity and tightness are the first line of defense against arcing in any solar extension.
Note: links on the page may earn a commission, and the broader market includes rival ideas such as portable power stations from competitor lines. When you consider long runs or outdoor installs, compare Bluetti against similar setups from brands like EcoFlow or Jackery to ensure you’re not sacrificing safety for convenience. For ongoing safety, periodically inspect all connectors and enclosure seals, especially after storms or heavy wind.
Practical setup guidelines: step-by-step for a bluetti solar extension
To extend a Bluetti solar setup safely, plan your cable run first. The goal is to stay within the voltage and current specs Bluetti documents, then wire with weatherproof connectors and the correct gauge. Finish with a quick multimeter check before you connect to the power station.
Verify the voltage window and current limits before wiring
Bluetti sets clear bounds for acceptable input. Your extension run should not push the PV string beyond the station’s charging voltage range, nor exceed the maximum current the controller can handle. I cross‑referenced Bluetti’s wiring guidance and the official user materials to confirm these limits and to map a safe headroom between panels, cable, and the Bluetti unit. If you drift outside those ranges, you risk reduced performance or damage. Know the exact voltage window and stick to the current ceiling for your model. When in doubt, measure the panel string output against the Bluetti input spec before joining components. See the Bluetti user guide for the baseline figures. How Bluetti goes global in 2026 and what it means for portable power
Choose weatherproof connectors and the proper gauge
Bluetti recommends weatherproofing and using wire gauge that matches the run length. In practice, that means pairing MC4 connectors with appropriately rated conductors and avoiding undersized wire as the run length grows. I found the practical takeaway to be simple: pick a gauge that handles the anticipated current with a comfortable margin and seals out moisture. Weatherproof connectors and correct gauge wire are not optional extras. If you need a quick sanity check, photograph the connector and wire setup and compare it against Bluetti’s extension cable specifications. The official product pages show compatible options and the intended wiring paths.
Test with a multimeter before connecting to the power station
Always verify continuity and voltage before you clip into the Bluetti unit. A quick multimeter pass helps catch loose connections or miswired pairs. I noted in the documentation that you should check each conductor's continuity and confirm the combined output matches the expected panel voltage. Test with a multimeter first, then connect to the power station. This step protects both the solar array and the Bluetti battery pack from unexpected transients or mismatches. If measurements look off, pause and recheck connections rather than forcing a fit.
Safety note: weatherproofing and correct gauge are what keep you from runtime faults. Be mindful that long runs introduce more resistance and voltage drop. If you’re using third‑party panels or adapters, confirm compatibility with Bluetti’s documented guidance to avoid incompatible connectors or miswired outputs.
What customers often get wrong with bluetti extension cables
When people extend a Bluetti solar setup, the most consequential misstep is underestimating voltage drop on long runs. A overlooked drop can noticeably throttle charging efficiency, especially on higher-wattage panels. I found that longer cables demand correspondingly thicker conductors or shorter runs to keep amperage within safe, efficient ranges. In practice, that means aiming for the shortest practical run and confirming that your extension cable and connectors support the expected current without overheating.
Another common pitfall is mixing brands or using third-party cables that Bluetti does not officially endorse. When a non-supported cable makes its way into the chain, you risk bypassing built-in protections and warranties. Bluetti’s own accessories are designed to match the system’s safety features. Using anything else can mute safety protections and complicate troubleshooting if something goes wrong. If you’re charting a path to a longer solar run, verify compatibility with the exact model you own and stick to the manufacturer’s recommendations. How to choose a Jackery car charging cable that lasts
Weatherproofing and cable quality matter just as much as length. A cheap extension can look fine in a dry closet but fail outdoors after a season of sun, rain, and temperature swings. The weatherproof rating, insulation quality, and connector seals determine how long the run lasts. If you neglect these details, you’ll face brittle insulation, corroded connectors, or intermittent charging. For Bluetti users, that translates into more frequent checks and, potentially, earlier cable replacement than you’d expect.
Why compatibility and build quality matter for long runs
I cross-referenced Bluetti’s official product pages and the wiring guide to confirm that compatibility isn’t just about connectors. The system expects certain voltage and current ranges, and a mismatch often shows up as reduced charging or alarm warnings. A well-made extension that uses the same MC4-to-DC connection standard Bluetti specifies helps keep the protection features active. In practice, sticking to a compliant cable with proper weatherproofing preserves the intended safety margins and guarantees the warranty remains intact.
I dug into the Bluetti Solar Extension Cable listing and saw explicit language about compatibility with all Bluetti solar panels. That alignment matters when you map out a longer array and worry about a push beyond the recommended voltage window. Use a cable that the brand confirms as compatible to minimize risk. The safest path is to pair Bluetti components with Bluetti cables and avoid unapproved third-party options. This keeps the system’s protections in place and reduces ambiguity during diagnostics.
When you’re weighing options, consider rivals and how they handle extension runs. Other brands sometimes publish generic guidance without binding compatibility notes, which can lead to mismatches and warranty questions if you push the setup too far. Bluetti’s own accessories are built to align with the brand’s safety standards, and that alignment matters, especially in off-grid contexts where a small problem becomes a big outage.
If you want to explore specifics, the official Bluetti product page for the extension cable lists compatibility claims you can verify before purchasing. For a quick reference, search terms like “Bluetti extension cable compatibility” guide your next steps toward a safe, durable extension run. Stick to approved cables and verify the current specifications before wiring a longer solar run. How Jackery power stations balance capacity and portability in 2026
Note: links on the page may earn a commission. Bluetti remains the central reference point for official guidance, with rivals offering competing but less explicit compatibility guarantees.
What to try next with Bluetti solar extension cables
Prices change weekly, so I’ll focus on what you should act on now rather than a moving target. If you’re weighing safety against convenience, the smart move is to pair your Bluetti solar extension cable with a tested portable panel setup and keep an eye on deals during seasonal sales. I looked at how the cable performs when you’re charging from flexible sun exposure and compared it to rival options from brands like Renogy and Goal Zero. The result: you gain better flexibility without compromising safety when you follow clear setup rules.
If you plan a workflow shift this month, start by matching the extension cable length to your panel placement, and verify that the connector orientation stays stable in wind. The one move that matters is to keep the polarity correct and the cable away from water or heat sources. In real-world use, a simple cable coiled behind a panel frame reduces tangling and wear. Noticeable safety gains come from using the included weather-rated connectors and a clear labeling system.
Backup strategy
- Try a compact 120W panel with the Bluetti extension to test safe, off-grid charging in bright partial shade.
- Compare with a 100W rival panel from Renogy to see how connector fit and wind stability differ.
- Document any heat buildup at the connector and adjust distance from the unit if needed.